Saturday, October 3, 2015

Sewing My Next Gown Historically

When I was little my family had a tradition, we would go to the steam engine show every year. We would look at old tractors. Us kids would climb up on them and pretend we were driving, while asking "Daddy, what's this?" as we pointed to different parts of the tractors and steam engines. We would get ice cream and sit on a grassy hill eating it. If we were lucky, we would stay late enough to see the tractor pull. We thought it was great fun to see the tractors do wheelies!
After several years of not going to the steam engine show, my family made time to go this year. We looked at old steam tractors, and slightly newer gas and diesel tractors. We climbed up on some of them (you're never to old to like big tractors!). We stayed late to watch the tractor pull. We saw a few old International Harvester pick-up trucks.


It was fun to see how the trucks had changed over the years, starting with this one from the 1910's.
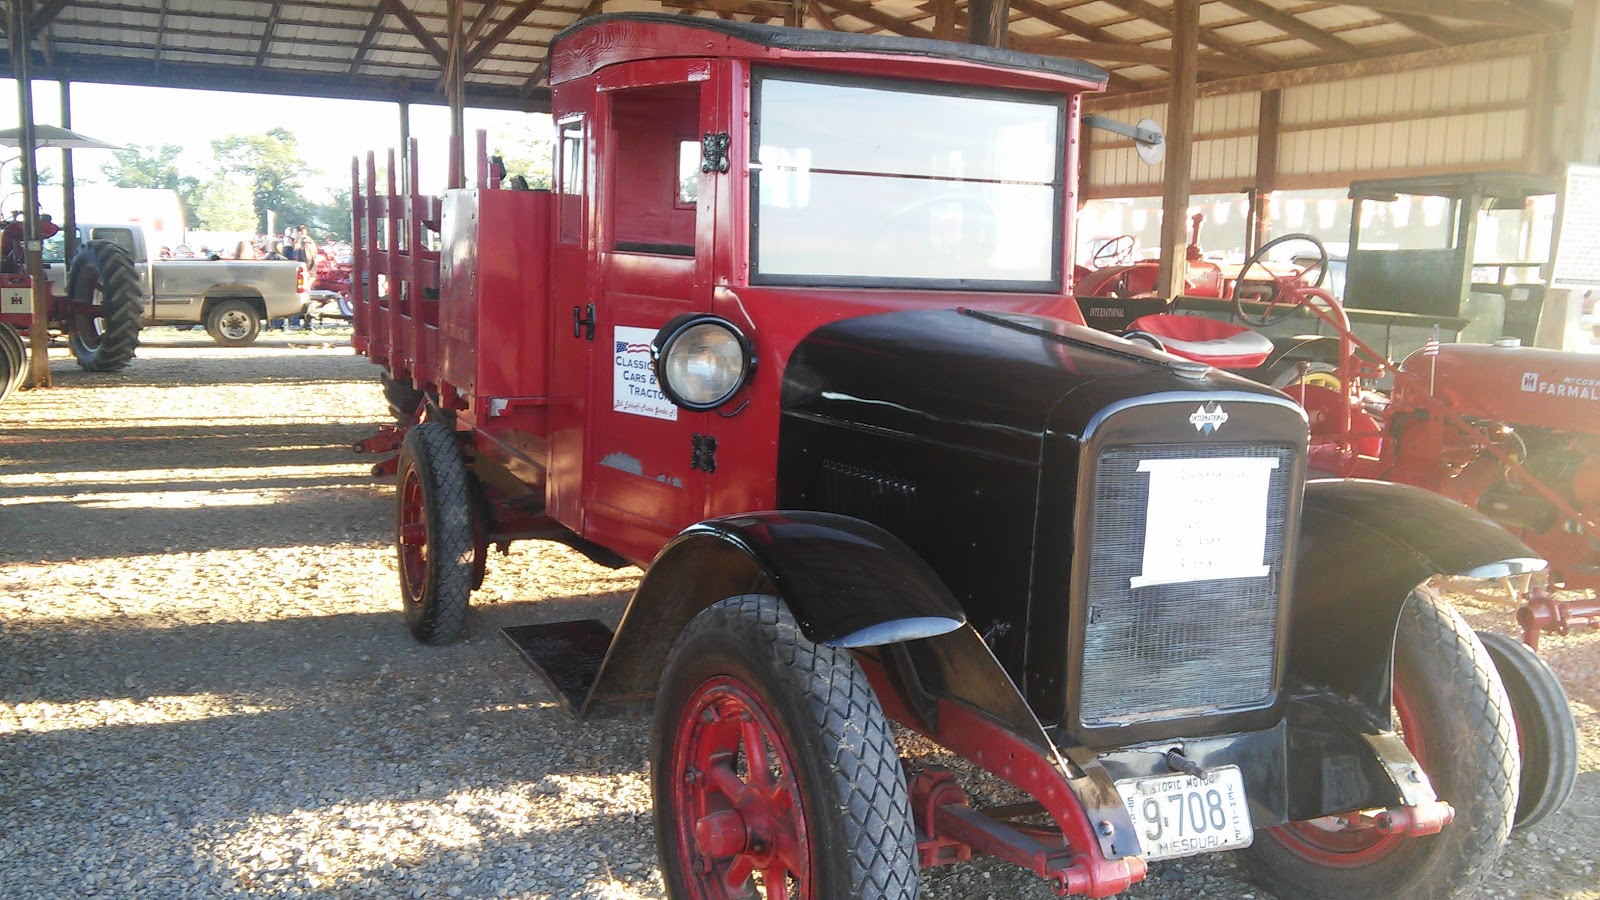

By the 1920's there was a cab.


Then in the 40's there were grain trucks (with the right bed of course, this one has a flat bed).


I just loved this 60's pick-up.

My favorite part however was this house.


This farm house was built in 1870 and the steam engine association has set up each room as close to the original as possible. I toured the house. I loved it. 

After I had wandered through the house I started talking to the ladies watching the house. We talked about historical clothing. One of the ladies pulled out some clothing they had there (from about the 1930's) for me to look at. Then came the fun part. 

Once we had looked at the clothing they had on the main level she sent me upstairs, telling me to look through the clothes in the closets! There were several pieces from the late 1800's and early 1900's, skirts, blouses, and jackets. It was amazing to get to handle these actual historical garments and see how they had been constructed. Most of the pieces had been machine sewn, but there was one skirt and one jacket that had been completely hand sewn. This really inspired me to completely hand sew my next historical dress!

Well a couple weeks ago I was going somewhere where I knew I would have a few hours free. So, I brought along a sewing bag with some of my current projects in it. On the way there I was thinking through what projects I had with me and what needed to be done on each. I had several things that needed to be cut out, but I didn't want to cut out that day, I wanted to hand sew. Sadly, I had left my hand sewing projects at home. Then I remembered I had the fabric for my next historical dress with me. I could cut out the skirt and start sewing it together by hand! There was one issue though, the only thread I had with me was purple, and the dress was tan. I was not going to use purple thread on a tan dress.

By the time I got this figured out I had reached the little town where I would be for the afternoon. I had a little extra time so I figured I could stop somewhere to get thread. My options for thread shopping were limited to, four gas stations, a Mosers, a pharmacy, and a Dollar General. I figured Dollar General had the highest chance of having thread, so that's where I went. They had thread, barely. For $1 I was able to get this 3-pack of thread.


Black, white, and off white. Now it wasn't the highest quality thread, so I wouldn't run it through my sewing machine, but it was strong and just fine for hand sewing. The off white would work for the skirt seams of my dress.
That afternoon I finally got around to starting on a dress I have been planning on making for the past 6 months. I cut into this sheet I found at Goodwill, back at the beginning of the year.


I loved the print, and thought it would be perfect as a historical dress.

I made sure to leave enough fabric for the bodice (which is still in the mock-up stages), and cut the rest into skirt panels.


(the mock-up stage is going very slowly. . .)

Then, I managed to get half the skirt seams sewn. I used the back stitch and whip stitched the seam allowances since that was how the late 19th century garments I saw were sewn.


At first I was a little nervous about hand sewing an entire dress. I was afraid I would give up and head straight to the sewing machine. To be honest, that's still an option, but now that I have finished the longest seams, the skirt seams, I'm feeling a bit more confident about my hand sewing ability. It has been rather relaxing to have a hand sewing project that I can take with me everywhere. For example, it was the perfect project to work on while I sat in the sewing room at the Heritage Festival.


Now, what will this completely hand sewn dress be? Something completely out of my comfort zone, that's for sure!


The pattern I sized up from Janet Arnold's book Patterns in Fashion 1.


 I wanted to make an 1840's fan front dress, but the book didn't have a pattern for that. So I sized up the 1840's bodice pattern and the 1850's fan front bodice pattern. I'm combining the two to get what I want. I'm a little nervous, but I figure I combine modern patterns all the time, how hard can it be to combine historical ones? The goal is to have a dress that looks similar to this when all's said and done.


Provided I finish it in time, this dress will be my entry for October's Historical Sew Monthly. The challenge for October? Sewing Secrets. What will the secret of this dress be? Well for now, that's still a secret. I'm pretty excited about it though!

Friday, October 2, 2015

My Little Sister's Adjustable, Yellow, Fancy Sleeved, 1837-40 Dress

As many dresses as I've made for my sister, I hadn't ever made her a dress from the same era as my purple plaid wool dress. So, she informed me she wanted one. Well, of course, I said I'd make her one. First though, I had to figure out a pattern. She's at that stage where she's too small yet for adult patterns to fit her, so that ruled out just changing up the pattern I used for my purple plaid wool, and most children's patterns are too small for her now (why oh why do most only go up to a size 8?!?!?). Also, she's growing really fast right now so I wanted a dress that could be adjusted as she grew. The last historical dress I made her only lasted about 3 months before she outgrew it! Thus, I was limited to about 3 patterns, and none were quite right for an 1837-1842 dress. So I started looking through pictures of girls' dresses from that era, while keeping in mind my pattern options.
My sister really liked the sleeves on this one from the MET Museum, and I liked the bodice.


I finally decided with a bit of finagling, the addition of a waistband, the loss of the drawstrings, and some lengthening of the sleeves, this pattern might just work.


My sister picked out the yellow floral striped calico from my stash. There was about 5 yards of it, so it was plenty for the dress.
Once the pattern and fabric were picked out, it was time to start manipulating them into an adjustable 1837 dress.


The bodice front I cut (almost) on the bias in 2 pieces. Once the center front seam was sewn, the stripes would make a "v", just like the bodice on this dress.


The sleeves I cut long, then pleated into the armscye (which was piped to match the era).


I then pressed the pleats so that they extended down the sleeve a little ways. 


I sewed two bias-cut bands over the pleats to hold them in place. The bottom of the sleeve was then gathered into the cuff, leaving the middle nicely puffed.


The top edge of the bodice was gathered, then sewn on to a wide bias strip.


I folded the bias strip over to encase the top edge, then inserted a drawstring. Yes, I know I said I would leave the drawstrings out of this dress, and I mostly did, but I decided a drawstring at the neckline would be a good idea. I made this dress a bit on the big side for my sister, and I didn't want the neckline to be *too* big. So the addition of the drawstring was my insurance against that. I used linen cord for the drawstring and sewed right up against it, using my zipper foot (love that thing), to make the drawstring look like piping.

Once the bodice was done I pleated both it and the skirt into the waistband, sewed everything together, and voilaA dress. A very long dress that majorly needed to be shortened, but that had been my plan all along. I love the look of grow tucks, and they are very much historically accurate for the time. So, I made three 1 inch wide tucks in the bottom half of the skirt.


Now as much as I love the look of grow tucks, I hate making them, I can never get my tucks to run perfectly parallel to the skirt hem. They almost always come out slightly wavy and uneven, despite measuring and occasionally remeasuring. So this time I tried something new. I took a piece of paper and marked where, in relation to the hem, I wanted the tucks. Then I folded up the skirt, over the paper, lining up the hem with my mark. Then I ironed the tuck in place before I removed the paper, this way I could make sure nothing shifted. Finally I pulled the paper out and pinned. It worked! In the end there were 3 lovely, parallel, evenly spaced, growth tucks!


Finally I sewed some buttons down the back, and my little sister had just what she wanted, a dress from the same era as mine!


A dress with fancy sleeves and room to grow! 


She and I wore our dresses to Walk Back in time, where her bonnet really stole the show!


Oh yes, her bonnet. That was a fun project the two of us did together.


We started off with a flat "straw" hat, which we cut part of the back off of.


I sewed bias tape along the edge we had cut, to make sure the hat didn't come unbraided.


Then came the fun part, we started playing with lace, ribbon, and silk flowers to trim this straw hat turned bonnet.


Playing with all the flowers and trims was lots of fun, and the end result lived up to our expectations!


Once her bonnet was done, my sister had a lovely 1837-40 ensemble ready to be shown off!

(to both goats and people)


She looked right at home in the schoolhouse at Walk Back in Time. 


She fit in pretty well at the general store too.

The only downside to her dress? The fabric is rather old, and weak in some places. After one wear, the bodice wound up with a couple holes. Nooooooooooo! 


Well we had spent the time designing and figuring out a pattern for this dress. Then I sewed it, and spent plenty of time figuring out those sleeves. Plus, this was a dress with room for her to grow. It was not going to be retired after only one wear! So I patched it.


First I cut a piece of fusible webbing to go over the hole. Now fusible webbing obviously isn't historically accurate, but I needed to strengthen the fabric around the holes somehow, so that the fabric wouldn't re-tear.


Then I cut a patch from the leftover fabric, did my best to match the print, and ironed the patch in place, fusing it to the original fabric. Finally I stitched down the patch around the edges. Now her dress is (almost) as good as new, and ready to wear again!


We already have plans to wear our dresses to another Heritage Festival next weekend. I love having my sister dressed from the same era as me. I'm already researching girl's dresses for the next era I have a dress planned for. Hopefully we pick a stronger fabric for the next one!


Sunday, September 27, 2015

The Shirty Shirt

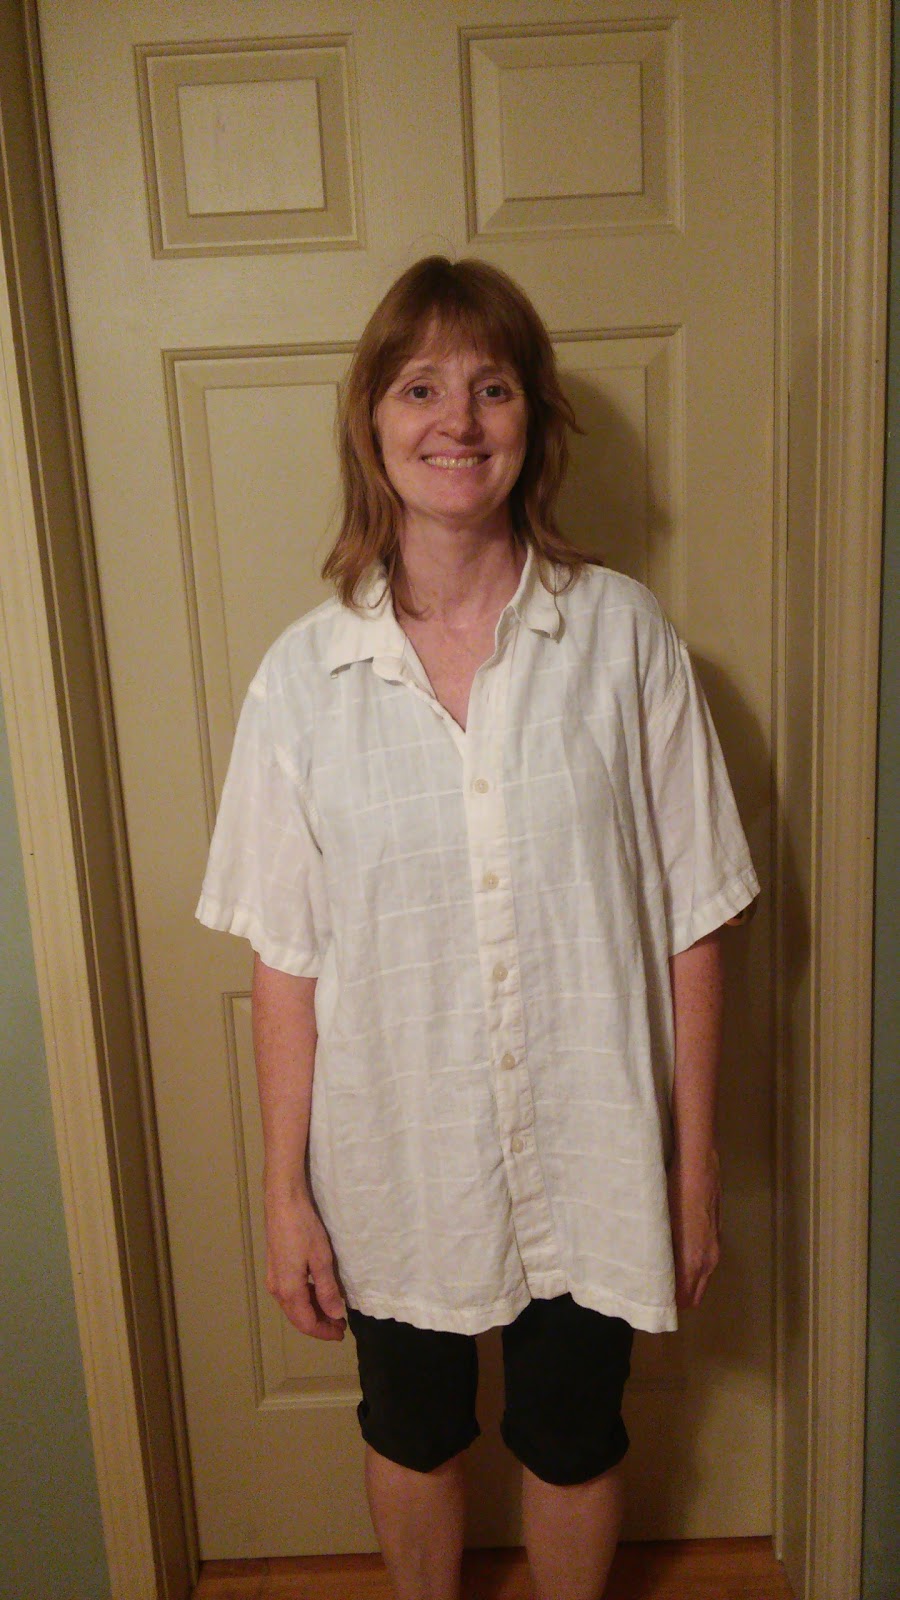
Yep, I refashioned another men's shirt. Remember how I mentioned in the last post that my mom really liked the tunic I made my sister and she wanted one too? Well, I decided to make her one. Not having a suitable shirt to turn into a tunic for her, I decided to got to a thrift store to find one. I came home with 2 shirts, one to make her a tunic top from, and this short sleeved, not too huge, white one.


It's a linen rayon blend and just about the softest thing you ever felt. That combined with the fact it was only $1 meant I had to bring it home. It would make a great shirt for my mom, if I ever figured out what sort of a shirt to make from it. 
I brought it home and showed it to my mom and sister. Like I did, they loved the softness of it. I commented that I wasn't sure what sort of shirt I would make my mom from it, and my sister immediately had a suggestion. 
"How about the Esme shirt?" she said.


"Perfect!" I decided. So my mom found her Sew Liberated Esme Top pattern, and I got to work. I had less than two days before The Refashioners 2015 ended, and I wanted to get this done for that.


I cut the back of the shirt from the front of the shirt, the front from the back, and the sleeves from the sleeves. There was just enough fabric! 


The pleats on the back of the shirt lined up perfectly with the new shoulder straps. So I left the original pleats in as a fun design feature, a way to retain as many of the original shirt features as possible. 


I also kept the original hem, I just had to open it up at the edges to sew the side seams. Then I resewed the hem at the sides.


The sleeves I feminized, thanks to my mom's suggestion, by making a casing and adding a drawstring.


I lined the yoke, and made the back facing, from some red and white striped cotton. It was left over from a sundress I made my sister at the beginning of the summer. All the original shirt buttons are on the back of the new shirt, so I used some buttons left over from another shirt refashion for the front of this shirt.

The shirt came together pretty easily. I sewed most of it in one night, and just had to finish up a few details on it the next morning. I finished it before the end of The Refashioners!


My mom was pretty happy with her new shirt. It was definitely fun to make her something after everything I've made for myself and my sister.


One of my favorite parts of this refashion is the button placket down the back of the shirt. I've been seeing lots of shirts made for The Refashioners with buttons down the back, so it was fun to make my own refashion with that feature.


My dad said my mom was beautiful, and the shirt was too. It's always fun to get his feed back when I make something!

This was a fun refashion all the way around, and I was so pleased to finish it before The Refashioners ends - today! A huge thanks to Portia at Makery for organizing this event. It has stretched my creative boundary, and now I can't see a men's shirt without thinking "what can I turn that into?" More shirt refashions will definitely make an appearance here in the future. After all I've still got this HUGE shirt to turn into a tunic top for my mom.

(and an awesome little brother who surprised us by coming home for the weekend!)

So keep your eyes open for the finished result, and all my other sewing projects that got put on hold due to shirt craziness!


Friday, September 25, 2015

The Shirty Tunic

After the last dress, the purple one, I was done refashioning shirts! I'd run out of shirts, plus The Refashioners 2015 ends on Sunday, so I didn't think I'd have time to make anything else. Well, I work well under pressure. So, I came up with one more shirt refashion idea that I just had to try. My dad had this short sleeve, too-big, missing a button, shirt, that he was willing to give up.


With a few chops, it was ready to turn into a tunic shirt for my little sister.

I cut a new, very wide neckline, then narrowed the sleeves and upper part of the shirt at the side seams.


First I sewed closed the bottom part of the button placket.


Then I sewed up the new side seams, and turned the excess fabric, where the new side seams ended, into big pleats, one at each side.


Where the pleats began and the new seams ended I sewed bias tape around the inside of the shirt.


This made a casing, in which I ran elastic through, cut to my sister's waist measurement. Next I used bias tape to finish the neckline and make another casing.


I ran elastic through that. Finally I sewed on a ribbon bow at the waist, where the missing button was, and the tunic was done!


My sister says it's very comfortable, perfect for every day activities.


Such as training her goats, to get them ready to show next year.


(Little Essie sometimes needs some encouragement to walk, but my sister is very patient with her)


This was definetly the easiest of the shirt refashions, it only took about an hour, but I think it might be the one that get's the most wear. My mom really liked it too, and wants me to make her a tunic like it!


Now, I don't think I'll have time to finish that one before the challenge ends on Sunday, but stay tuned, I may surprise myself!