Yes, I'm in Japan right now*, but this blog post has absolutely nothing to do with that. Instead, this is the final blog post in the series of how I made my very first 18th century gown almost two months ago now - because I really need to finish up the blog posts on this project! If you've missed the previous posts, you can find how I made the gown itself here, and how I trimmed the gown here.
I made my Robe a la Francaise in the week and a half leading up to the Rococo Picnic. The petticoat, stomacher, and trimming? I did that all the day, and night, and early morning, before the picnic.
I made my Robe a la Francaise in the week and a half leading up to the Rococo Picnic. The petticoat, stomacher, and trimming? I did that all the day, and night, and early morning, before the picnic.

After cutting out my gown, I had 40 some odd inches of fabric left. This was just what I needed for the front of my petticoat. The back of my petticoat would have to be made out of some other fabric. As the back would be hidden under my gown, this was be perfectly acceptable. (And supposedly, petticoat backs made from cheaper fabric than petticoat fronts is period accurate as well.)

The leftover piece of fabric was longer at the selvage edges, and shorter in the middle - which happened to be perfect. I would be wearing my gown over pocket hoops (also called side hoops, or paniers). These hip-basket type things give the correct wide-hipped silhouette for the mid 18th century. And they make the distance from waist to hemline longer at the side seams than it is at the center front or center back.

I smoothed out the uneven edge of my fabric panel, leaving it longer at the selvage edges and shorter in the middle. This would be the top of my petticoat, as the hemline needed to be cut straight - and yes, that meant the birds on my petticoat would be upside down. That's the way the fabric worked best, so that's just the way it would be.

I put on my pocket hoops, then held the panel of fabric up to myself to check the length and see if the upper curve was correct or if I needed to work on it a bit more to get an even hemline. Everything looked good, the hemline appeared to be even, so I moved on to cutting the back of the petticoat.

For the back of the petticoat, I decided to use the red linen left over from the under petticoat I made back in January. I cut it exactly like the front panel of the petticoat, then sewed up the side seams, leaving the top 8"-10" open so I would be able to reach into my pockets, and hemmed the thing.

Once that was done, I put my pocket hoops on the dress form, put the petticoat on over them, and set to pleating the upper edge.


I sewed twill tape to the pleated upper edge, left long tails so the taps could wrap around my waist and be tied in place, then flipped the twill tape to the inside and top stitched it in place.

Once the waist tapes were sewn in place, the petticoat was done and wearable! And it was time for me to leave for work, on the day before the picnic. So, off to work I went. When I returned home that evening, I first attached all the trim to the gown, then I began on the final piece I needed for my 1760's ensemble to be wearable - the stomacher.

The Stomacher is that triangular piece on the center front of the gown. It is made completely separate from both the gown and the petticoat, and just pinned in place over top of the stays.

The stomacher is made up of 3 different layers of fabric, a linen lining or backing, a cotton buckram interlining (Linen buckram would be the historically accurate choice here, but I didn't have time to make any so I used the cotton buckram I had on hand instead.), and the outer layer from the same fabric as my gown. The buckram interlining was cut 5/8" smaller all the way around than both the lining and the outer layer to prevent it from added extra bulk to the seam allowance.
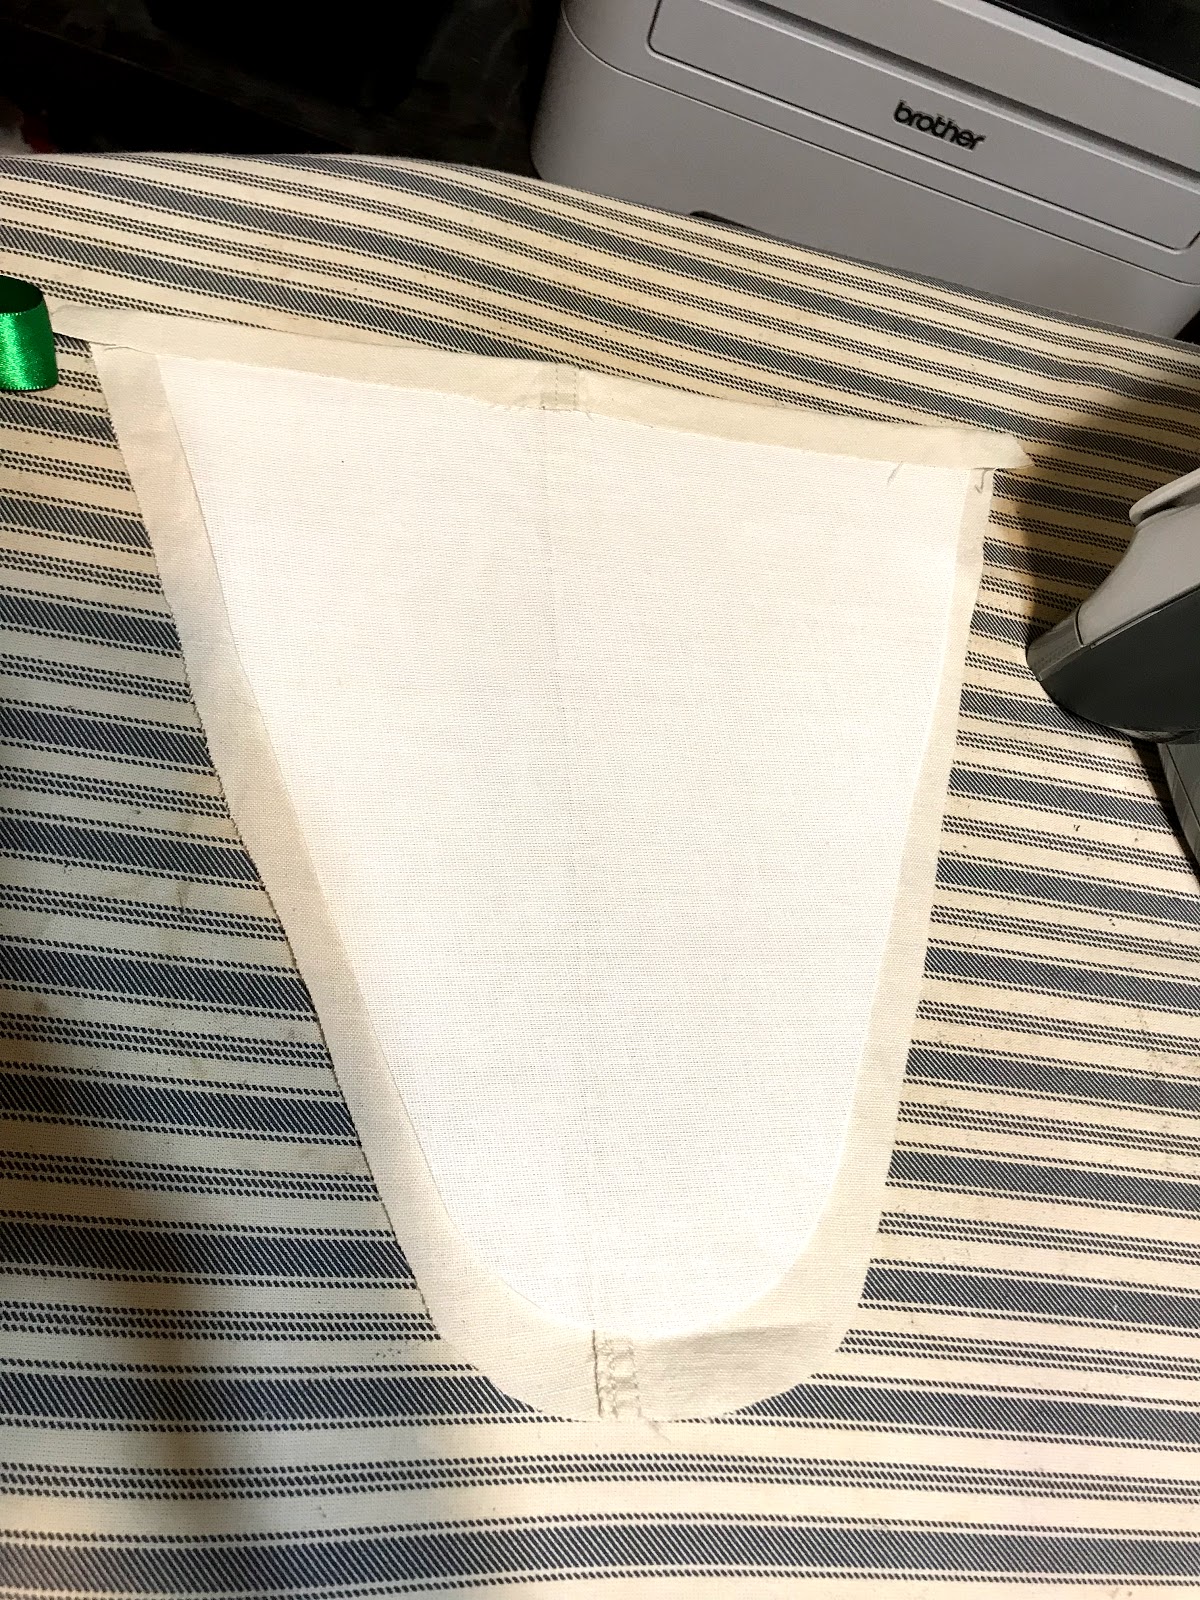
Once the buckram was cut to size, I used it as a template to press the edges of both the linen lining and the cotton outer fabric in 5/8" all the way around.

With the edges pressed neatly in, I set to decorating the outer layer of the stomacher with 1 1/2" wide green ribbon, to match the ribbon trim on the rest of the gown.

I chose to make four simple, two-loop, bows in gradient sizes down the center of the stomacher, to match those on my inspiration gown.

I left long tails on the bows, which I wrapped around the edges of the stomacher and pinned in place on the back. The center knots of the bows I tacked in place by hand.

Once all four bows were made, pinned, and tacked in place, I layered the cotton outer layer, over the buckram interlining and the linen lining and pinned the edges of all three together. I cut 6 short lengths of twill tape, folded them in half to make loops, and pinned three down either side of the stomacher, sandwiched between the cotton and linen layers. These loop/tab things would make it easy for me to pin the stomacher in place over the front of my stays.

Finally, I top stitched about 1/8th on an inch in, all the way around the edges of the stomacher, securing all three layers together. And with that, at 3 am, the night before/the morning of the picnic, my very first 18th century gown was done and wearable!

So, after a few hours of sleep, I tied on my petticoat, pinned my stomacher in place, put on my gown, pinned it to my stomacher, then hopped in the truck and drove to St. Louis - ready to picnic in style!

It was worth staying up until 3 am for!
*As I'm currently half a world away from my proof-reader, please excuse any typos in this post!
I did my best to proof read it myself, but I'm sure I missed something!
Thank you for sharing this GORGEOUS gown..I'm currently working on the same pattern..and cut it out before i read the AD book.that says no cotton .Silk..i can't afford..i was stuckon the self fabric trim as cotton does fray..now that i see yours I'm going to try to copy how you finished your trim...thank you
ReplyDeleteThank you! There are definitely examples of extant cotton and linen sacque gowns - the hard part is just finding the right prints! Good luch on your gown, you got this!
Delete