In the years I spent dreaming of and planning my Strawberry Sacque, I had plenty of time to consider what pattern I would use and how exactly I would construct my gown. I knew I wanted to hand sew it, but what pattern would I use?
In 2019 I made my first Sacque back with the American Duchess Simplicity pattern - Simplicity 8578. It was easy to use, fit me well, and came together beautifully. It would be so simple to use it again!
But. . . In the years since making it I've learned more and read more and made more historical dresses. Soooo, now it was tempting to either drape my gown from scratch, using the instructions in The American Duchess Guide to 18th Century Dressmaking while also referencing pattern shapes and such from Patterns of Fashion 1, Costume Close-Up and The Cut of Women's Clothes, or to size up a pattern out of one of the latter three afore mentioned books.
When it came down to actually beginning my gown, 2 months before the ball, I just couldn't resist the simplicity of the Simplicity Pattern, so I went with a hybrid option - Simplicity 8578 with some pattern pieces altered to better match the pattern shapes of 1770's and 1780's sacques in the books.
First things first, I tried on my cotton Sacque to double check the fit before cutting into my silk. I decided to add an extra inch or so of length to the bodice. I looked at the bodice lining patterns in the books and decided the Simplicity bodice lining pattern was good enough.
I cut the lining out of some linen I had left over from my 18th century shift. After using the scraps of this linen to line a couple different 18th century bodices, I was down to the last little bit, and had to do some considerable piecing to make this work.
I boned the bodice back with zip ties along either side of the center back opening.
The back lining of sacque gowns was often left open to make the gown adjustable, this opening was then either tied or laced closed. On my cotton sacque I sewed on tapes to tie it closed. This time I opted to sew eyelets and lace it closed. (Now that I've done it both ways I've decided I actually like the ties better - they allow for greater adjustability to individual areas.)
With the lining sorted out, it was time to finally cut into my silk. I cleaned my floor, and unrolled the fabric. . .
There were a few wrinkles that could make cutting difficult, but the idea of hauling the whole roll of silk down to my ironing board was daunting, so instead I brought the iron to the fabric. I laid a couple towels on the floor under the fabric and touched it up as needed.
Then I proceeded to cut out my largest pieces first - the back panels.
I added several inches of length to the bottom so I could have a train, and added a considerable amount of width to the panels.
My favorite sacque made by another costumer in recent years is the Modern Mantua Maker's Autumn Francaise from fall of 2020, its gorgeous and amazingly floofy! She apparently used two full widths of 55" silk in her back pleats, so I decided to do the same to get that magnificent swoosh!
It was totally worth it.
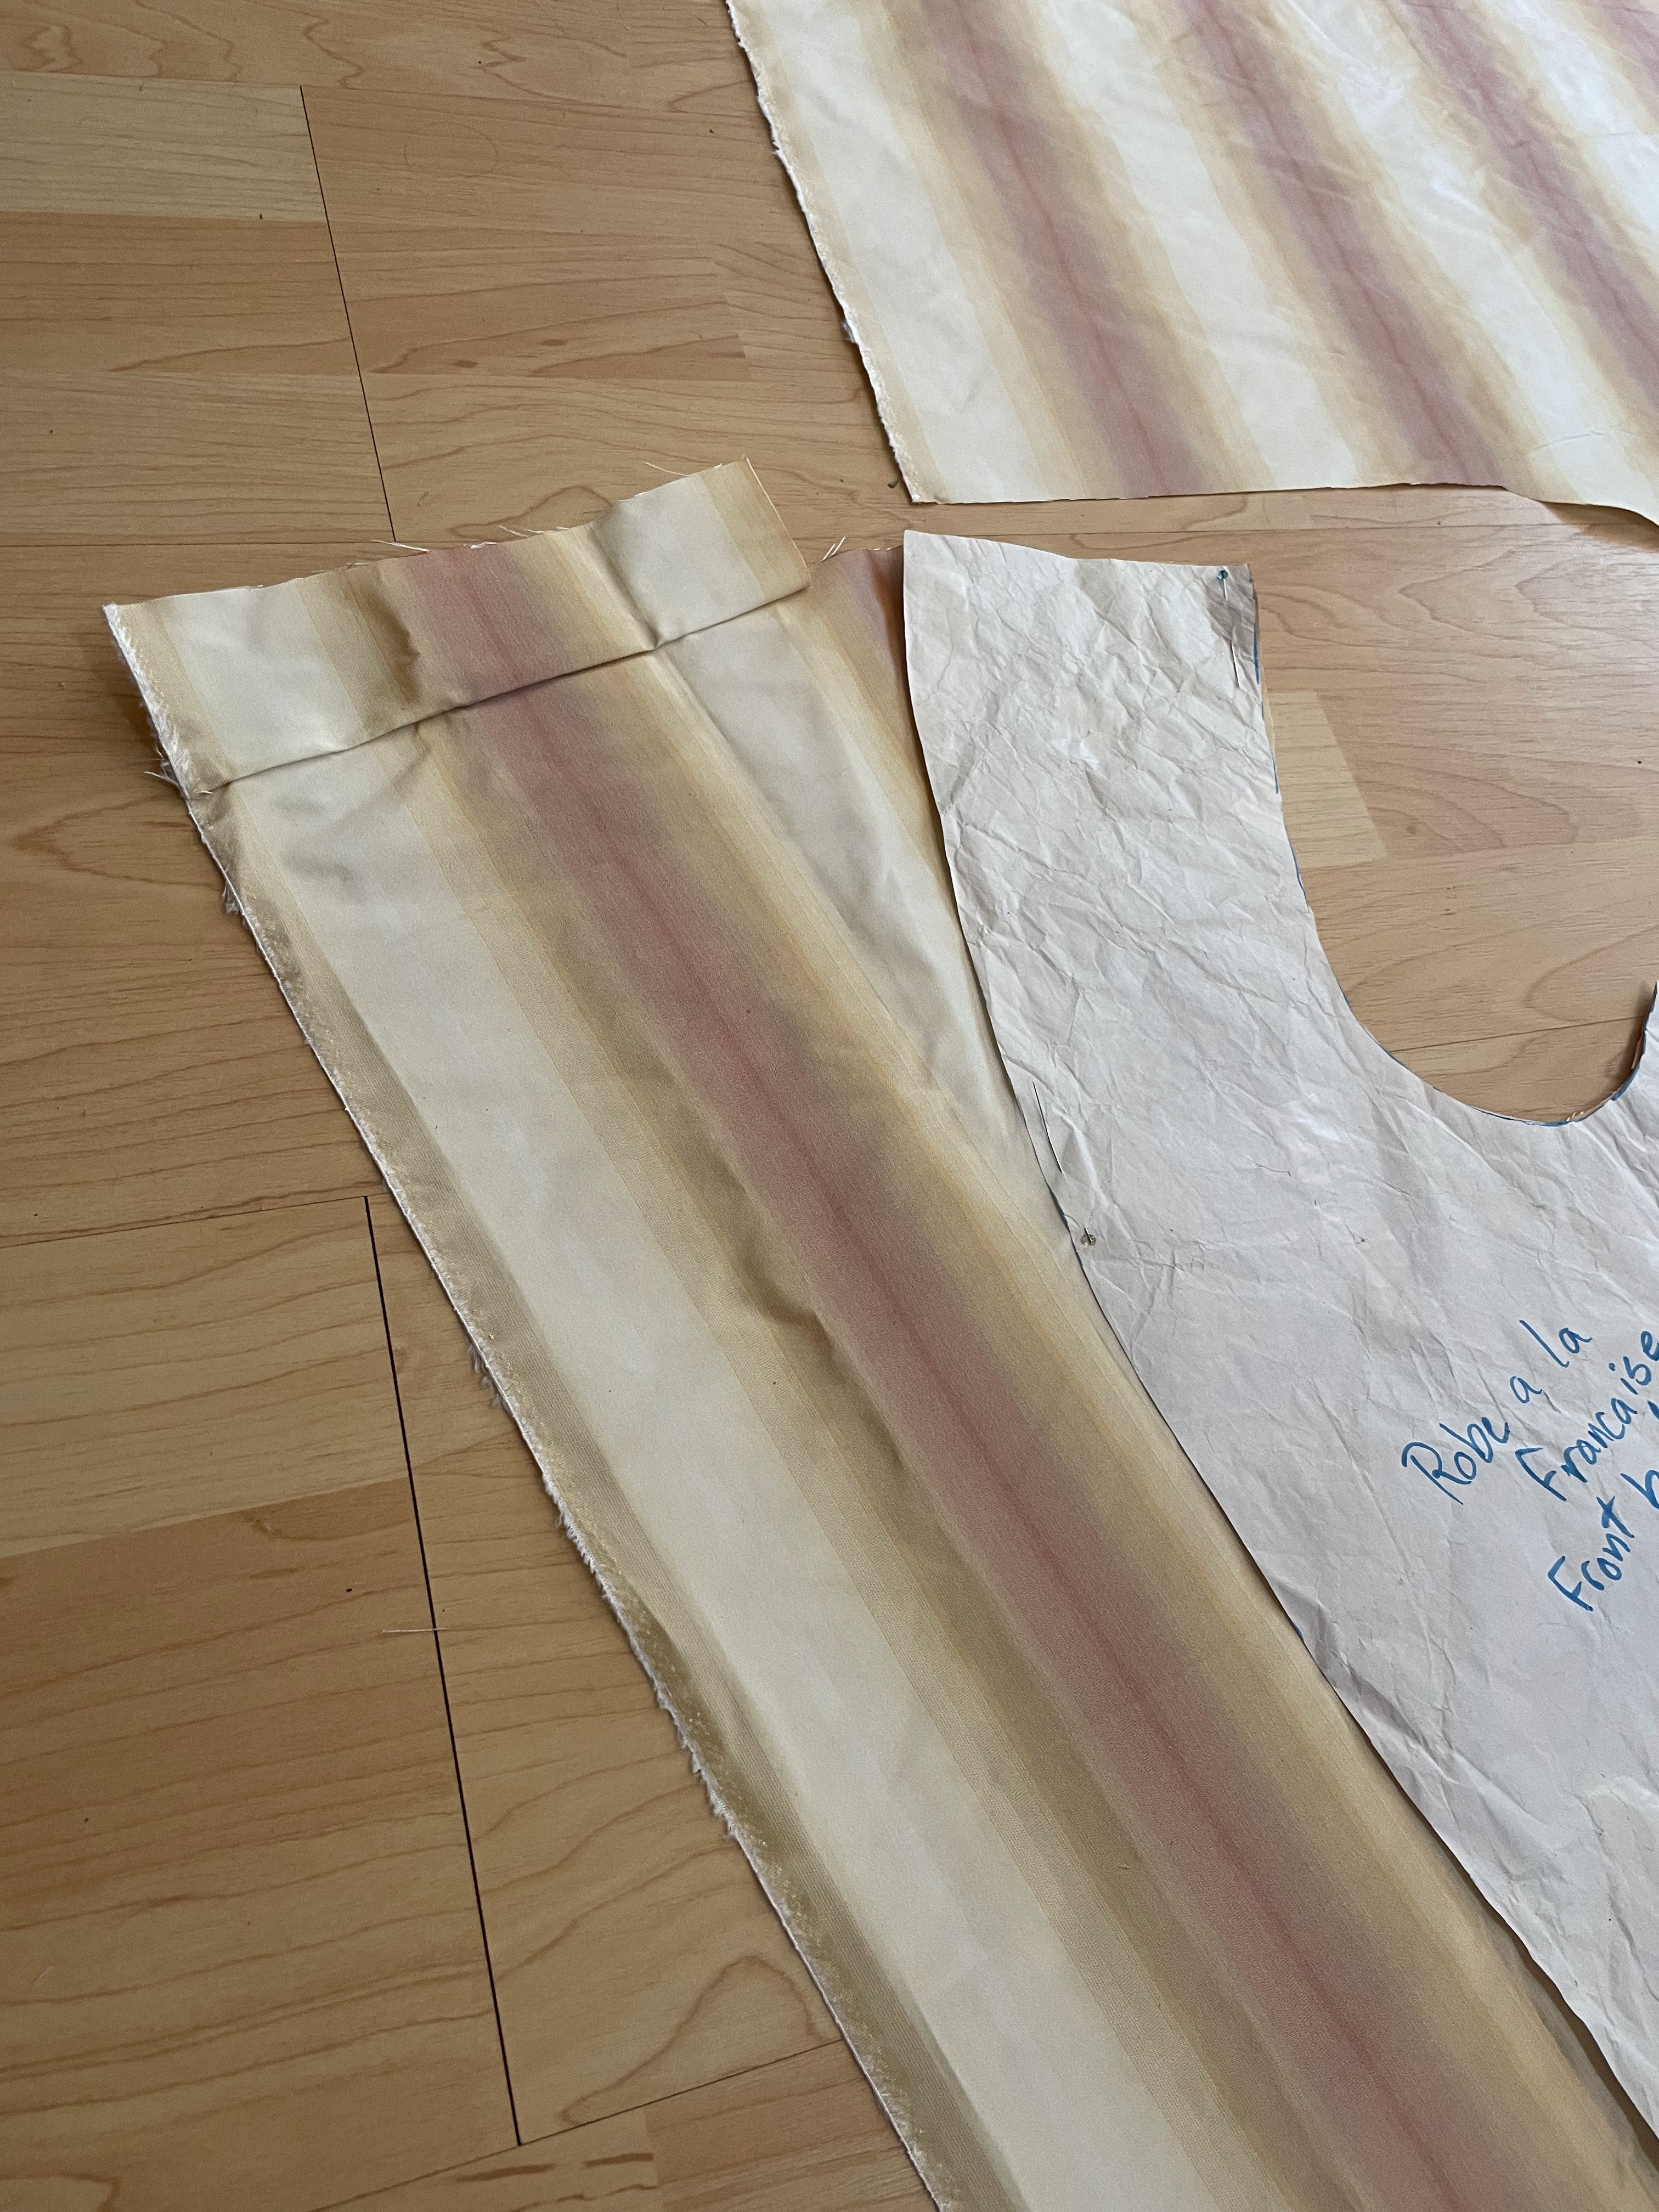
Back panels cut, it was onto the front of the gown. My Favorite Sacques in Patterns of Fashion 1 and The Cut of Women's Clothes had cut-on robings, so I decided my gown needed cut on robings.
Thankfully the American Duchess book gives clear instructions on how to do cut-on robings on their 1740's gown, and my kitty cat helped to make sure I did it right!
I cut out one side of the bodice front, then realized I should have added some additional height to the top of the robing so it would pleat nicely over the shoulder strap. I pieced some fabric onto the top of that robing, and cut out the second side of the bodice properly.
Next up was the front skirts. Both the American Duchess book and the instructions I found in the front of Patterns of Fashion talk about adding a gore to the side seam edge of the front skirt. The Simplicity pattern has this gore cut in one with the front skirt panel, rather than it being a separate piece seamed on.
For the sake of "historical accuracy" I decided to do the separate gore and cut my front skirt panels accordingly.
I may have regretting this decision when I was actually sewing on the skirt gores. That extra seam was annoying!
Oh well, moving on. . .
The one part of the Simplicity pattern I find not to be historical at all is the sleeve shape. It matches the sleeve shape in the American Duchess book alright, but doesn't resemble the sleeve shapes in any of my other 18th century books. It's quite modern in shape, and, despite knowing from my cotton sacque that it fits me well, I just couldn't bring myself to use it. Instead I pulled out the Larkin and Smith English Gown pattern sleeve piece.
The Pet en L'air I completed last year taught me the Larkin and Smith sleeves were a bit too tight for me. So, when I made my pink linen gown over the summer I enlarged the sleeve a bit to fit more comfortably, and this altered pattern piece is the one I decided to use for my sacque.
Once the sleeves were cut out the last few pieces were easy. The Simplicity pattern already features a compare stomacher (one that is cut as two separate pieces and fastens up center front) like I wanted so no alteration was required for that! The sleeve ruffles too were already quite satisfactory, so I cut those out as the pattern directed and just adjusted the size of the scallops to fit my vision.
The petticoat I just cut as two rectangles the full width of the fabric, one for the front and one for the back. I used the petticoat pleating guide from the Simplicity pattern to shape the top edge to fit nicely over my pocket hoops. Super easy.
It took a full afternoon to cut my gown out, and when it was done it was a relief! I'd spent so much time contemplating the best pattern and cutting choices for this gown it felt amazing to have those decisions made and done. I couldn't change my mind about the pattern now! I could move on the the part I was much more confident about - sewing the thing together!
I had two months to do it. Plenty of time!
There was no way I'd be finishing my gown up late the night before the ball. . .
. . . Right?
Surly not!
I'll tell you that story next time!